SENIOR APPS – HELP
My Easy Phone Senior App
Overview
On a single page, you can access the main functions normally used by most folks.
Buttons that open your device’s default app:
Text
Email
Maps
Camera
Video
Flashlight
Buttons that open Easy Phone pages:
Phone and Voice Mail
Internet
Barometer
Phone and Voice Mail
Tap ‘Phone’ on the main page to enter the phone page. Here you can use the dial pad to enter a phone number. Then click ‘Done’ to send the completed number to the device’s dialer.
Toggle button: USA – Other
Mode: USA
Here, you must enter the standard 10 digit number starting with the area code.
Mode: Other
Here, you can enter any freestyle number you wish. Use this mode for international calls.
Device Contacts
Tap ‘Contacts’ at top-right, and select from the list
Voice Mail Setup
From the main screen, tap Settings (3 dots), and enter your voice mail number, then tap the ‘+’ button to save
Internet
Click this button to open up your favorite links page. Tap on the item of your choice to open up in the device browser. All items are editable and you can add or delete at will. The ‘Home’ page has been preset to: https://www.msn.com, and again, is editable.
To Add, Edit, or Delete, click on ‘Manage’.
Add Link
1. Enter your new links short name
2. Enter the address, including the ‘https://’ or ‘http://’ as the case may be
3. Tap ‘Add New Link’
Edit Link
1. Click ‘Select Link’ and choose the link to edit
2. Type in the new address, again including the ‘https://’ or ‘http://’ as the case may be
3. Tap ‘Edit Link’
Here is an example of how to edit the Weather link to get your local weather:
1. Weather has been preset to the National Weather Service: https://www.weather.gov/
2. We will now set to the weather in your area using your zip code
3. Tap the Weather link, the browser appears with national map
4. Tap the 3 dots and choose: Open in Chrome
5. Upper left area, enter zip code
6. Choose your city in the drop-down menu that appeared
7. Map now appears for your area
8. Tap the 3 dots, then Share…
9. Choose: Copy Link
10. Go back to My Easy Phone, Manage page
11. Edit Link, Select Weather
12. Press and hold finger in Address area and a ‘Paste’ option will appear
13. Tap ‘Paste’
14. Tap ‘Edit Link’
Video (Android)
Unfortunately, Android with it’s new security storage rules, the video might be saved in a somewhat obscure location. Some Android phones save the video in the normal, Camera Roll folder, while other phones do not.
iOS saves the movie in the normal location: Pictures > Camera Roll
Here is the Android location if not in the Camera Roll folder:
My Files > Internal Storage > Android > data > com.thecomplokgroup.myeasyphone > files > Movies
(Sorry, hopefully this will change soon and we will publish an update if it does!)
Barometer
Get a quick look at the atmospheric weather conditions based on pressure.
In general, low pressures are associated with inclement weather and higher values are indicative of clear and warmer conditions. What matters even more is the trend of the pressure over several hours. Rising values = better weather ahead.
How to read the barometer
Under 1009
Steady or rising: clearer and cooler weather
Slowly falling: rain
Quickly falling: storm
1009 – 1023
Steady or rising: present conditions
Slowly falling: little change
Quickly falling: storm, rain, or snow
Over 1023
Steady or rising: fair weather continues
Slowly falling: fair weather
Quickly falling: cloudy, warmer conditions
Keep in mind and a disclaimer here, that smartphones utilize sensors that are not as precise as a regular barometer. So if you need absolute accurate values, use a regular barometer.
The units are in Hectopascals (hPA), which is now the universal unit of measure.
1 hPA = 1 mBar
1 hPA = 0.02953 inHg
1 hPA = 0.000986923 ATM
SENIOR MED RECORD MOBILE APP
Important Notice:
This app has been upgraded, modernized and replaced by: MEDICAL RECORDS PRO
It is now offered by: Team Quantanon at https:\\quantanon.com
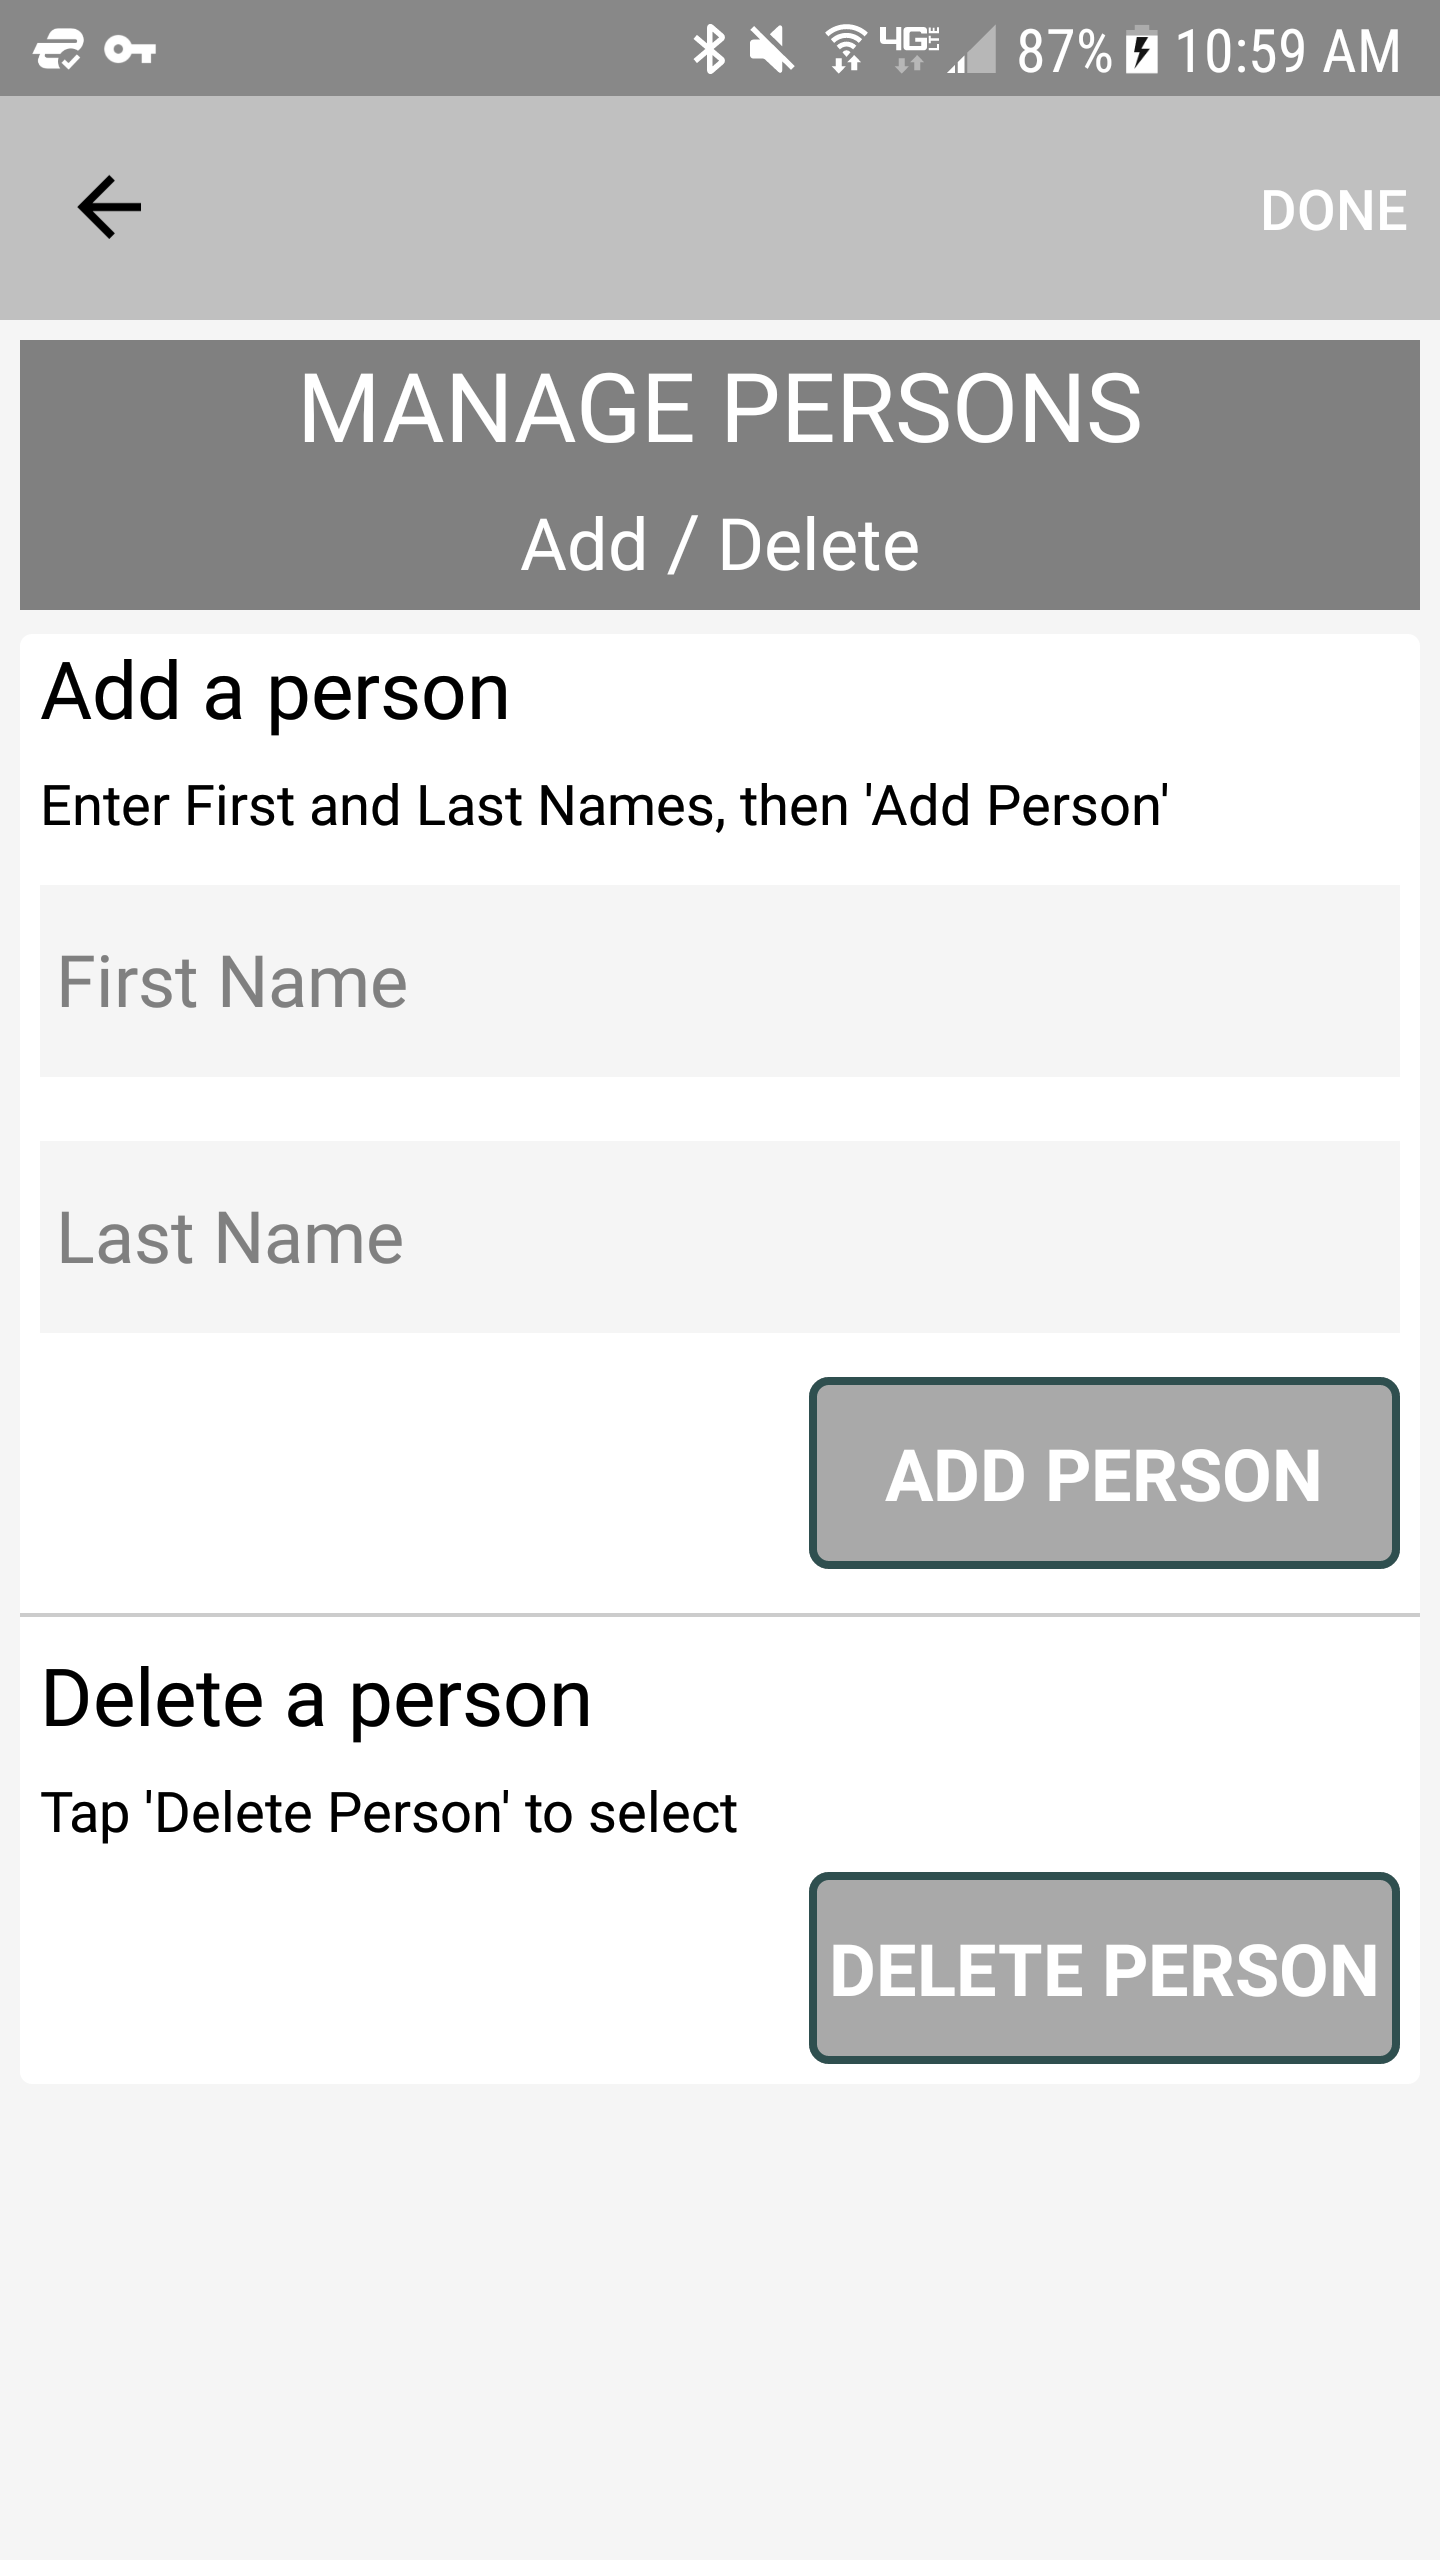
Add Person
To add/manage a person(s):
Tap Settings (3 dots) > Persons (Add/Delete)
This is the first thing to do.
After adding a person, you can then input medical data for that person.
You can add unlimited persons to the app.
To Change to another person, just tap the top Name Label, and select another person.

Add Records
Tap the Category Icon and select medical category from the shown list. Once in that screen, you can tap the Add ‘+’ Icon to go to the add screen for that category.
Medical Categories
- Appointments
- Medications
- Current Problems
- Past Problems
- Allergies
- Blood Pressure
- Tests
- Surgeries/Hospitalizations
- Vaccinations
- Family History
- Providers
- Provider Questions
- Insurance
- Contacts
- Logs
- Images
These categories have Group Headings available in the add screen:
Appointments
Medications
Tests
Vaccinations
Insurances
Providers
Doctor Input – Google Navigation and Phone Call
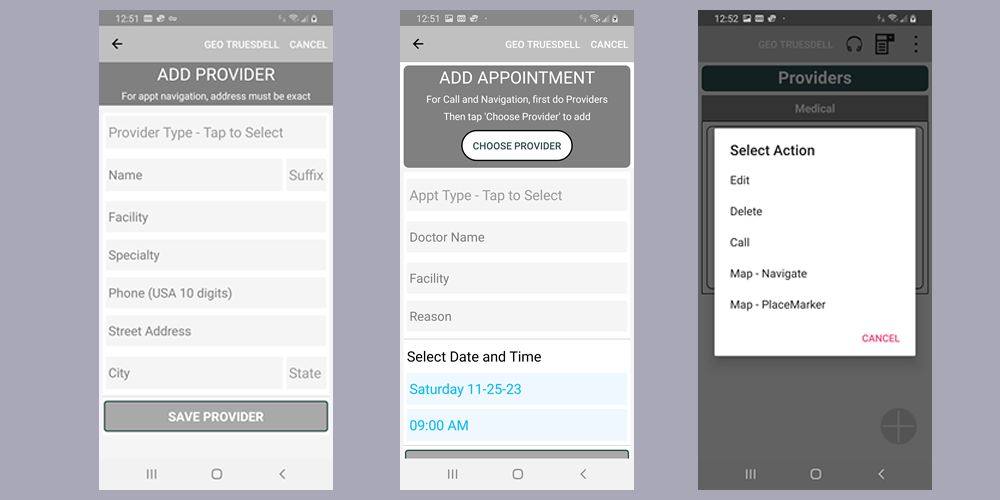
If you wish to use the Maps Navigation feature when you tap on an appointment in the APPOINTMENTS screen, then you must enter your PROVIDER information FIRST (including full address and 10 digit phone number). Then, when you click on your APPOINTMENT you will then see these options and more:
Call
Map – Navigate
Map – PlaceMarker
About the address:
For the maps navigation to work properly, please enter the exact and full address.
This means adding in the ‘Street’, ‘Ave’, or whatever it is.
About the phone number:
All USA numbers require a 10 digit entry, the the area code first.
Summary of steps in order:
1. In ‘ADD PROVIDER’ screen, enter the info, including full address and 10 digit phone number.
2. In ‘ADD APPOINTMENT’ screen, click on the upper button: CHOOSE PROVIDER
3. Select previously added provider in step 1, and you are good to go for Navigation and direct Phone Calling.

Edit / Delete Records
Just tap on a record in any category and select Edit or Delete.
Phone Calls
You can make phone calls directly from several categories. Just tap on an item and in the options, you will see a ‘Call’ option. These categories are: Appointments (if used the ‘CHOOSE PROVIDER’ button), Providers, Insurance, Contacts.
Again, for the appointment calls to work, you must first go the the Add Provider page and enter a 10 digit phone number for that doctor. Then in the Add Appointments page, select the ‘Choose Provider’ button, instead of entering a name manually.
Category Sorting
Some categories allow for manual sorting by Name and/or Date. These are: Current Problems, Past Problems, Blood Pressure, Tests, Surgeries/Hosp, Vaccinations, Logs, and Images.
If a category allows for manual sorting, the UP/DOWN icon will show in the top bar. Tap it to see options.
Category Groups
Some categories have options in their ‘Add’ screens for the selection of a group title.
Appointments
Medical-InPerson, Medical-Telemed, Study-Test, Dental
Medications
Prescriptions, OTC, Supplements
Tests
Blood Work, X-Rays, MRI-CT, Study-Procedures
Surgery/Hospital
Surgery, Hospitalization
Vaccinations
Vaccinations, Flu Shots, Covid Jabs
Providers
Medical, Dental, Therapy
Insurance
Medical, Dental
Listen To Records
Click on the head phones icon, next to the person name at the top
Google Maps Integration – Review
To use this feature, enter a complete address when adding a Provider in the Add Provider screen. Always use the proper street suffix in full. Add the doctor before you add an appointment. In Add Appointment, use the Choose Provider button to add a previously entered provider. Then when you click on an appointment in the appointments screen, you will be presented with options:
- Edit
- Delete
- Call
- Map – Navigate
- Map – PlaceMarker
- View Reason
Map – Navigate, will guide you to your destination from your starting point.
Map – PlaceMarker, will open a map with a Place Marker at the destination.
Call – Call the provider directly from the app.
Print Medical Record
Files prepared for printing are stored in the app’s Print Files folder. To access, tap the Settings and Options (upper 3 dots) and select Print Files.
Then tap on the desired person and select from options Read or Share. If your idea is to print the record, then select Share and share with an app, part of the phone, or cloud, to print with the app’s device print app.
Medical Documents
There is a new Image category.
In the Add Image page, you can open your phone’s camera, take a photo of a medical record and save it with a short description and date.
You can also store important medical documents on your device. This is especially important in an emergency where the attending physician would want to see them.
Recommended documents include x-ray reports, scanned EKG’s, significant test results, etc.
Just use your device’s copy or move commands to move them into a device location of your choice. Another option is to attach a USB and drag files from your MAC or PC to the device.
Share Data Between iPhone and iPad
You can use the iCloud to share a person’s medical file between devices.
Make sure both devices have the same Apple ID, are logged in, and connected to wi-fi
Step 1: Create Common Folder
- In either device, tap ‘Files’ icon
- Under locations, select: iCloud Drive
- Tap 3 dots (upper-right) and select: New Folder
- Name folder: Complok
- Complok folder should now show in your other device’s iCloud Drive
Step 2: Export Data File (ex: John Smith.xml)
- In the app, tap ‘Options’ (3 dots) and select: Export Person File
- Select desired Person – Share options opens
- Select: Save to Files
- Select: iCloud Drive > Complok folder
- Tap ‘Save’ (upper-right)
- File should appear in the Complok folder of the other device
Step 3: Import Data File (ex: John Smith.xml)
- In the app, tap ‘Options’ (3 dots) and select: Import Person File
- Browse to Locations > iCloud Drive > Complok folder
- Select: Desired person’s name (the .xml may or may not be showing)
- File imported
- Tap ‘Select Person’ or if imported person’s name is showing, tap to select and refresh data
